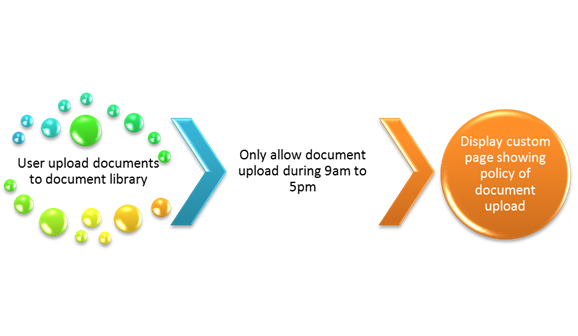
Event receivers in SharePoint allow great flexibility to meet various user requirements, and with each version of SharePoint there are improvements to enhance their usability. One of these added abilities is to redirect user to a custom page (essentially a SharePoint Application Page) while cancelling the event from an event receiver. Let’s consider this scenario: an HR department wants to place a new policy which requires all the users to only upload documents into a document library from 9 a.m. to 5 p.m. Moreover, as this is a new policy, there should be a page that displays the details of the new policy, whenever a user upload is cancelled. The following diagram shows the flow.
Now, a “Item Adding” event receiver will take care of the first part of the requirement, but for the second part there is no OTB support to achieve this in SharePoint 2007. However, SharePoint 2010 provides an excellent way to do this with little bit of an effort. The following steps show the detail of how to achieve this.
First, create a new Visual Studio 2010 Solution and expand “SharePoint 2010” from “Installed Template” and select project type “Event Receiver.” Give a desired name to the solution and project. My previous article covers the event receiver project creation and some required configuration in detail, if you need more help on this topic please refer to it. Also make sure that your project’s target platform is “x64” and target framework is “.NET Framework 3.5” this is a requirement for all SharePoint 2010 projects.
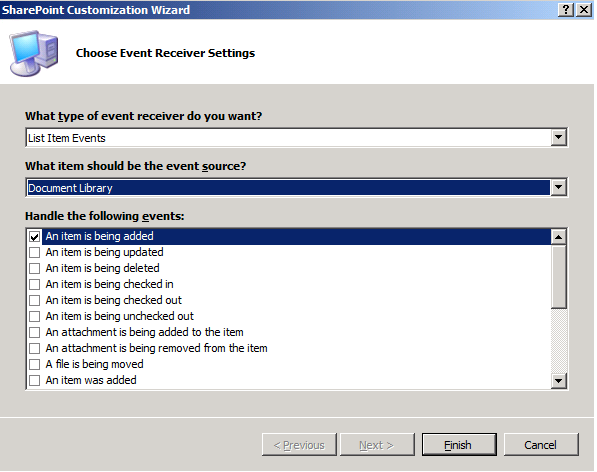
“SharePoint Customization Wizard” will appear. In “type of Event Receiver” select “List Item Events.” From “event source” drop down select “Document Library”. Also select the checkbox for “An item is being added” from the list of available events. See the figure below.
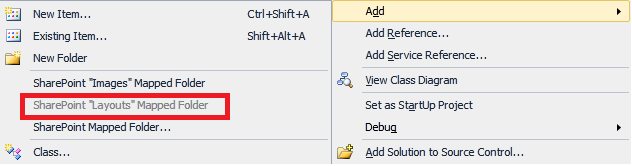
After the project is created, create a page that will be displayed when a document upload is declined. For this, add a layouts folder to the project. You can do it by right clicking on the project and select “SharePoint “Layouts Mapped Folder;” see the figure below.
This will create a layouts folder, actually a subfolder with the same name as project. This layout folder basically corresponds to SharePoint 2010 “Layouts” folder inside the “14” hive (e.g. <DRIVE _LETTER>:\Program Files\Common Files\Microsoft Shared\Web Server Extensions\14, where DRIVE_LETTER represents a system drive where SharePoint 2010 is installed and in most cases it’s a C drive)
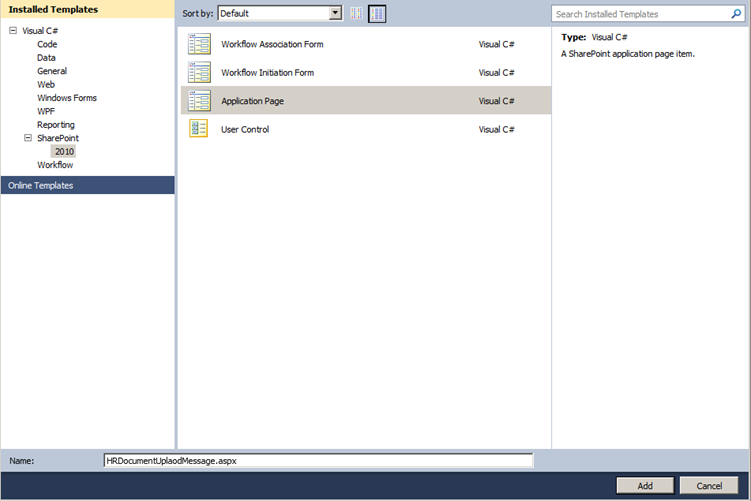
Right click this subfolder inside the “Layouts” folder, and select “Add, New Item.” This will open a new dialog, select “Application Page,” and use “HRDocumentUplaodMessage.aspx” as a name.
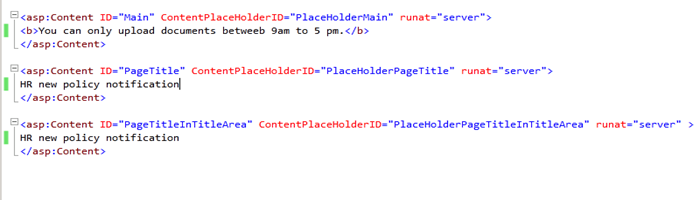
Click “Add.” This will add this application page to the layouts folder. Add the following markup to it as shown below.
In order to add the logic to cancel the document upload, and to display the custom page, add the following code fragment to the “Item Added” event handler.

Replace “[SubfolderName]” with the actual name of the folder created inside “layouts” directory in the previous step by Visual Studio. This is by default set to the same name as of the project.
The code inside the “Item Added” event receiver first make a check that current hour is between 9 am and 5 pm by using “DateTime.Now.Hour” which is in 24 hours format. The value “17” in 24 hour format equates to 5 p.m.
Next, the property “Status” is used. It’s actually of type SPEventRecieverStatus, which in this case sets to “CancelWithRedirectUrl. ” This ensures that event will be canceled and the user will be redirected to a specific URL. The URL is defined and set by another property “RedirectUrl” which takes a relative path to a page which must resides inside “layouts” folder within 14 hive.
Once all of this is done, press F5. This will build and deploy the solution and open up a new browser window with a SharePoint 2010 site.
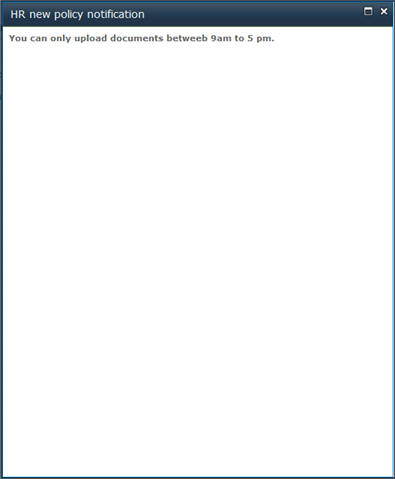
In order to perform a actual test, make sure that current time on development machine is between 9am to 5pm (you may want to temporary change the current time of your development machine for this test and then revert back to original time later), otherwise logic in the event handler to display custom page will be not executed due to the time interval check .Finally browse to site (if it’s not already opened), and then open any document library and try to upload a document, the custom page should be displayed as shown below. Close the dialog page, and view the document library, notice that the document was not added to the document library. Alternatively when you perform the same upload procedure between 5:01 PM to 8:59 AM your document will be upload successfully.